Wednesday, July 25, 2012

Messy Gracie Sweet Sauce Stir fry Beef with Ocra

I have posted up a few healthy food these past few days so today I am going to post up something not really healthy but not really that unhealthy as well..Confusing? ha ha..I followed this dish from a recipe taken from a book which is in malay called 1 recipe 1 day...but I have a feeling I am going to finish it in more than 1 year..ha ha...My dish is called Sweet Sauce Stir Fry Beef with Ladies Fingers


INGREDIENTS
Serving for 4 people or more
  • 600 gm Beef - Cut into thin slices
  • 1 Red Capsicum and 1 green capsicum..Whichever colour you like - cut into thin long slices
  • Ladies Fingers or some called it Ocra...why is it called Ladies Fingers anyway? Is it because it look like a finger? Let me see mine....don't think so...Throw away the head and tail, then cut your fingers into half - ha ha ha ha....
  • 5 or more (if you like more) Red Onions - Cut into thin slices
  • 3 or more (if you like more) Garlic - Cut into thin slices
  • Some Canola oil for cooking.
  • Sweet Soya Sauce - Sweet one ar...or in malay called MANIS Kicap
  • 2 cups of water
STEPS

Step 1

  • Heat up the wok and pour in some oil. Then stir fry the garlic and onion till they are fragrant and soft...Remember do not burn them so constantly fry them
  • Throw the beef into the wok and then stir fry to mix it with the red onion and garlic
  • Once mix properly, pour water into the wok to cook the beef..Cook it for a while till the beef is soft and tender. Remember to check the water level. If it goes down, better fill it up a bit...Not too much though we do not want to change this dish to be a soup dish


Step 2
  • Pour in 4 to 5 tablespoon sweet soya sauce..And Mix it with the beef..Please taste it to make sure it is enough taste. If not, please put some more sweet soya sauce.
  • Throw the Ladies Fingers into the wok and then fry it to mix them all together.
  • Cover with a lid and let the ladies fingers cooked. Do not overcook the ladies fingers okie...
  • When the ladies fingers about to be cooked, last step will be throwing all the capsicum into the wok and fry it a bit...You do not have to cook the capsicum for too long if you want the crunchy feeling...


DONE...Simple right!

Sunday, July 22, 2012

Messy Gracie's Banana Protein Powder Smoothie

I never thought of buying myself protein powder before until my sister suggested the powder to me. She said it helps build and also repair muscles after a workout. So I did some research and it is actually not bad. So I started on my protein powder 3 weeks ago and guess what my muscles are not that sore after a workout..Kudoos to protein powder but please do not consume too much yeah. I took one scoop (around 22 gm) and shake it with water and drink it after every workout..

Some people do not really like the taste of some protein powder..Some are too sweet some are tooo powdery or too proteiny if you have such a word...anyway I bought mine from GNC and it is yummy..not too sweet...

Last Sunday, I decided to do an experiment and decided to do something out of my protein powder for my lunch which is also healthy and low carbo as well..

Decided to make my Messy Gracie's Banana Protein Powder Smoothie

Do not really know the total calories but trust me it is below 200 and is healthy as well...if you are into healthy smoothies now and then..


INGREDIENTS
  • 1 scoop (22 mg) of protein powder
  • 2 Bananas - used 2 because my last 2 bananas are going to go into the rubbish bin soon so had to use them. Any type of banana if you wish but if it is a big banana just use one enough
  • 1 cup of low fat milk - some people use almond milk also can or those lactose free type of milk if you have problem with lactose
  • Ice cubessssss
STEPS

Step 1

  • Take out a blender and pour in the protein powder, and milk into the blender
  • Cut or tear using your own hands the banana and place them into the blender. Please remove the skins yeah
  • Put 4 or 5 ice cubes or more if you want it more chilled..


Step 2
  • Blend all of the ingredients till you see a very smooth smoothie...yummmyyy


DONE...Simple and surprisingly delicious..For those who are on the go and good for a quick lunch or snack fix...Try it and you will love it...

PS: Forgot to take the picture of the done part because I was too hungry..drank all of it before I remembered I had to take the picture..ha ha

Thursday, July 19, 2012

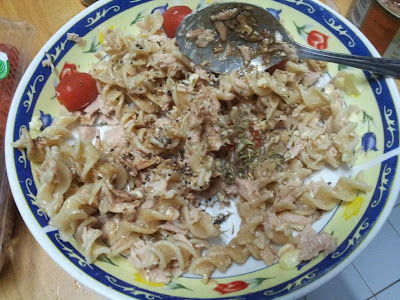
Messy Gracie's Fusilli Tuna with cheese salad

Trying this new healthy recipe for lunch. Something which is very different from what I normally cooked but I love experimenting.

Preparation time taken by me : 20 minutes

Calories : 280 per serving (1 cup of Whole Wheat Fusilli)


INGREDIENTS
  • 1 cup of any whole wheat pasta - I used Fusilli...bought it from the organic shop. Not really cheap but 1 cup can eat quite a while.

  • Half tin tuna, drained - not mayonnaise one but better buy vegetable oil or olive oil or sunflower oil or water type of can tuna

  • 1/4 or less if you do not like cheese cheddar cheese or feta cheese..try to get the light type but expensive

  • 4 to 5 cherry tomatoes

  • 1 tbsp Olive Oil
  • Optional spices and flavors - Balsamic Vinegar, thyme, basil, parsley, black pepper - up to you.
  • half Lemon
  • Some salad leaves
STEPS

Step 1

  • Cook the pasta according to the instructions on the packet. Mine I cooked for roughly around 10 minutes.


Step 2
  • After pasta is cooked, throw away the water and place the pasta into a plate or a bowl so you can mix it with the other ingredients later

  • Mix the cheese and tuna onto the pasta and stir it so due to the heat of the pasta the cheese will slowly melt.

    Cut the tuna into smaller pieces so is easier to mix together with the pasta

  • Put the cherry tomatoes into the plate

  • Drizzle 1 tbsp of olive oil onto the pasta and mix them well

  • Drizzle 1 tsp of balsamic vinegar onto the pasta - you can put more if you want

  • Sprinkle the spices like basil, oregano, thyme, black pepper or other type of spices if you want..not too much though..over doing it makes the pasta YUCKY

  • Squeeze some lemon onto the pasta and then mix all of them properly


Step 3
  • Place 3 or 4 salad leaves inside a container or a plate

  • Pour the mixed pasta with tuna onto the container or plate

    I used my hand to dig out the tomatoes so that it will be on top of the pasta to look good for picture taking..ha ha ha ha....


DONE...

Best thing is you can make it the night before and put it into the fridge and then take it out and eat it the next day during lunch...YUMMY...

Monday, July 16, 2012

Messy Gracie Low Carb Bread - Her Very First Bread Making..

I never bake a cake or a bread or biscuits before so since I just bought my new lover my elba oven, I decided to try baking bread. I did not tell everyone I am going to bake bread because I worry they will say "huh..better go buy bread outside" or "Come come let me buy bread for you"...or my bread turned out to be stones where I can basically throw people with it. ha ha..anyway last night I tried out my very first Low Carbo Bread since I am into healthy eating. I do not believe that healthy eating means eating yucky things like oats or salad only. Don't get me wrong I am not against oats or salad but I intend to find healthy yummy delicious food and thus my bread...so lets start baking. [PS: Got this recipe from bodybuilding.com...]

Calories counting is around 60 to 70 per piece of bread...big one but mine is small little one..ha ha


INGREDIENTS
  • 1 1/2 cups ground flax seeds (I used organic Flax Seeds which I bought for RM4.50 at the organic shop which is not bad..)
  • 1/2 cup oats flour (I bought quick cooking oats and then blend them to be flour..much more fun that way)
  • 1 tbsp baking powder
  • 1 tsp salt
  • 1 tbsp honey (Or you can use brown sugar or maybe those sugar with non calories one) - This honey has been with me for quite a while. Not really sure whether it is expired or not..Can't see the expiry date. But it still smell good..Oh well, if I go to the loo after taking the bread, I will throw the honey away...

    PS:The person holding the honey IS NOT ME...for those who are wondering whether I am baking half you know what...tsk tsk tsk...need clorox to clean your brain people...

  • 3 whole eggs (I think is too much..so you can use only 2 or 1)
  • 4 white eggs (Also too much..so you can lessen it to 3)
  • 1/2 cup water
  • 1/3 cup oil - Now since I do not have virgin oil, I used canola. So not really sure virgin oil will taste the same or not...you can also lessen the oil
STEPS

Before you start anything, please preheat the oven to 350 Fahrenheit or 176 Celsius

Step 1

  • Blend the flax seed using the blender. But after blending, the 1 1/2 cup flax seed becomes more so better measure it again. The remaining one you can mix it with your milk or orange juice and drink it. Flax seed is very good for you. Will tell you why later on under my recipe.
  • Blend the oats using the blender. No difference after blending..still 1/2 cup....

    PS:If you are lazy to blend, you can try find oats flour and ground flax seed some where...


Step 2
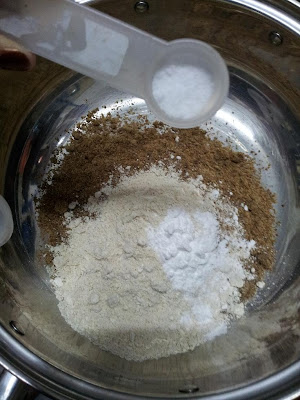
  • Pour all the dry ingredients (blended oats, flex seeds, baking soda, and salt) into a mixing bowl. I do not have a steel bowl so I used a pot..ha ha..can also lar..
  • Use a mixer or a fork to mix them all properly...Mix Mix Mix. make sure they are all blended well.


Step 3
  • Separate the 4 eggs yolk from the whites and pour them into the mixing bowl

  • Pour the 3 eggs into the mixing bowl
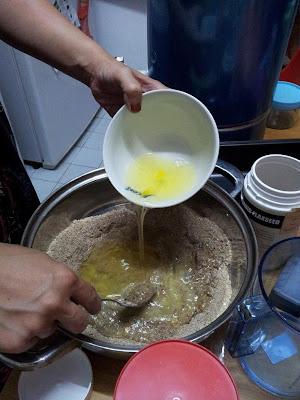
  • Pour the honey, water and oil into the mixing bowl

  • Stir all the ingredients together. Make sure no dry stuff is left dry...Stir and Stir and Stir. By now, you might see that the batter is not really thick..It is kinda watery..Do not worry..just stir and then after all of them are mixed properly, let it sit there for a while..They will thicken up.


Step 4
  • Pour the batter into a bread making pan. Not really sure what is it called. I bought it for RM13. Please do not waste, use a wooden spoon or in my case my clean finger, and make sure all the batter goes into the pan.


  • Place the bread making pan into the oven. REMEMBER please be careful DO NOT burn your hand when you put it in.
  • Bake for about 20-25 minutes or until the middle part looks golden brown (so the recipe says but mine is not really golden brown..do not know what colour it is) and has a springy feel in the middle. I tried it out using my finger..it goes POING POING POING..ha ha ha ha minus the sound effect...


DONE...


For those who are interested on what are flax seed please do click the link below...useful info especially those who are into health and into loosing weights...

Flax Seed Health Benefits

I try to take 1 tbsp of flax seed everyday where I mix it with my milk or orange juice.....happy trying